Esse texto foi publicado pela primeira vez no dia 27/04/2015 no Medium
I’ll guide you through from installing our main script to sending an event-triggered email.
Hi there. You’re reading this for two main reasons, I suppose: just subscribed to Route and want to understand the steps you should follow to start using the tool or subscribed sometime ago but couldn’t figure it out how to send the first event-triggered email.
I know how it feels when you really want to try a new tool that might help your business but things are not that easy on a first moment. But I think I can help you explaining the first steps you should take to send your first email through Route.
Come with me, it’s just 4 steps:
- Paste on your website our main tracking script;
- Create a campaign;
- Write the emails;
- Enable the campaign.
Paste on your website our main tracking script
Go to Route’s setup page and take a look at the two options you get: Magic and Manual.
The first thing you need to know is that the main tracking script is the same for both options.
What differs from one another is that on the Magic option there’s a blank check-box that if you click to check it, will allow our script to automatically scrape your website content to find forms and integrate them with Route.
It will also create events based on those forms.
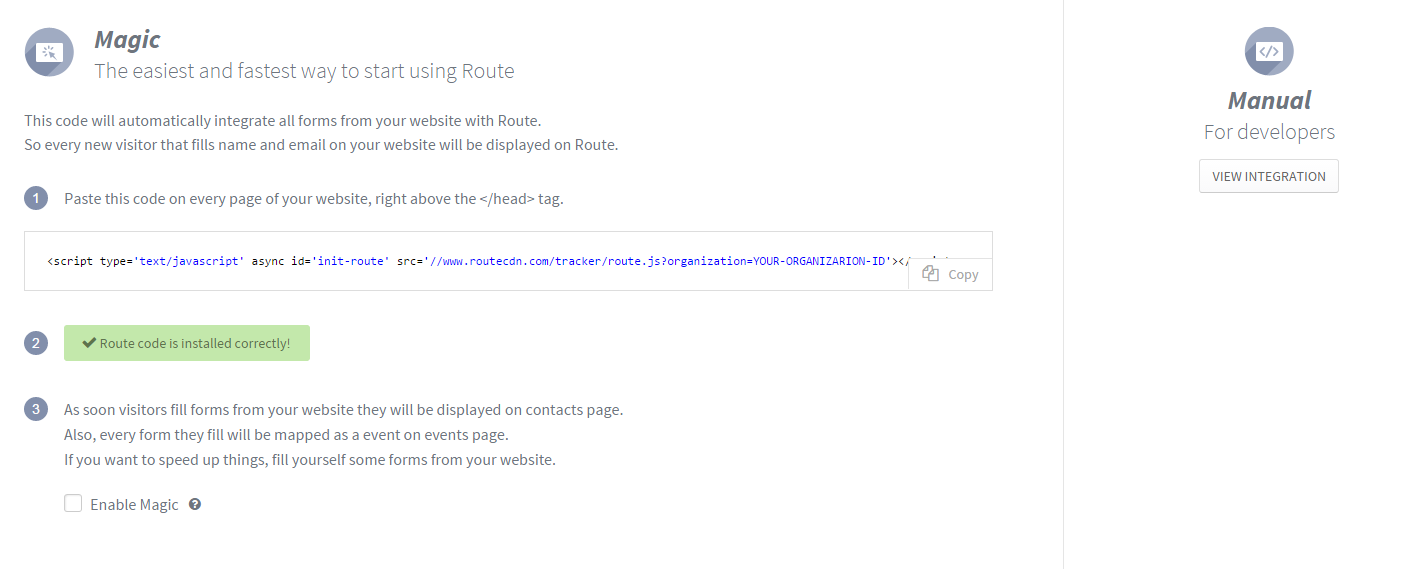
This is our own Route account (yes, we use Route here at Route).
Three things to consider while looking at this picture: I replaced our Organization ID on the code to YOUR-ORGANIZATION-ID. After you install the main tracking script on your website correctly we’ll tell you that everything is ok. And at last, we’re not using MAGIC internally because we have a team of developers to put every integration manually.
If you choose the Manual option we’ll show you the JavaScript you need to use to identify contacts (e.g. integrating Route with your forms) and to track events.
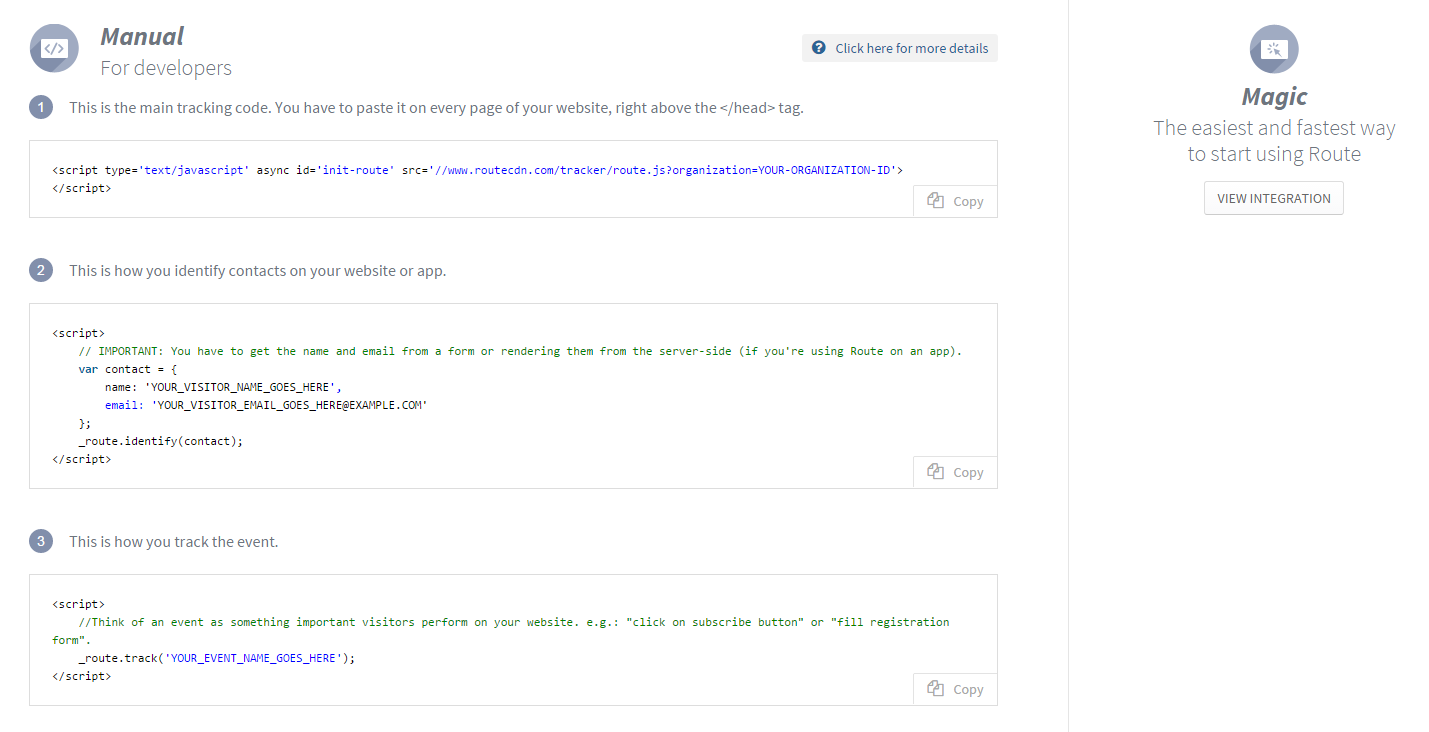
This option we recommend to developers or marketers that have some knowledge on JavaScript or have a team of developers to help.
For the sake of this first-steps-kind-of-guide I’ll recommend you to select the magic option and just check that check-box allowing Route to integrate the forms and creating events based on those forms.
I mean, this is the easiest way to take the first step to send your first email.
After you enabled Magic you can take a look at the events page and you’re supposed to find information about the events created. Something like this: “Name of the form based on the call-to-action” from “URL” (e.g. “Register” from /trial/ or “Subscribe” from homepage.).
All set? Let’s move on.
Why you should install the main tracking script first? Because if you don’t do that, Route will never be able to gather data and track the users and events on your website.
Create a campaign
After enabling our Magic script (or integrating everything manually) you’ll have integrated your website’s forms with Route and already have some events tracked. Now it’s time to create your first campaign.
It’s inside campaigns that you’ll set the triggers that will tell Route “ok, this contact meets every condition to receive this message”.
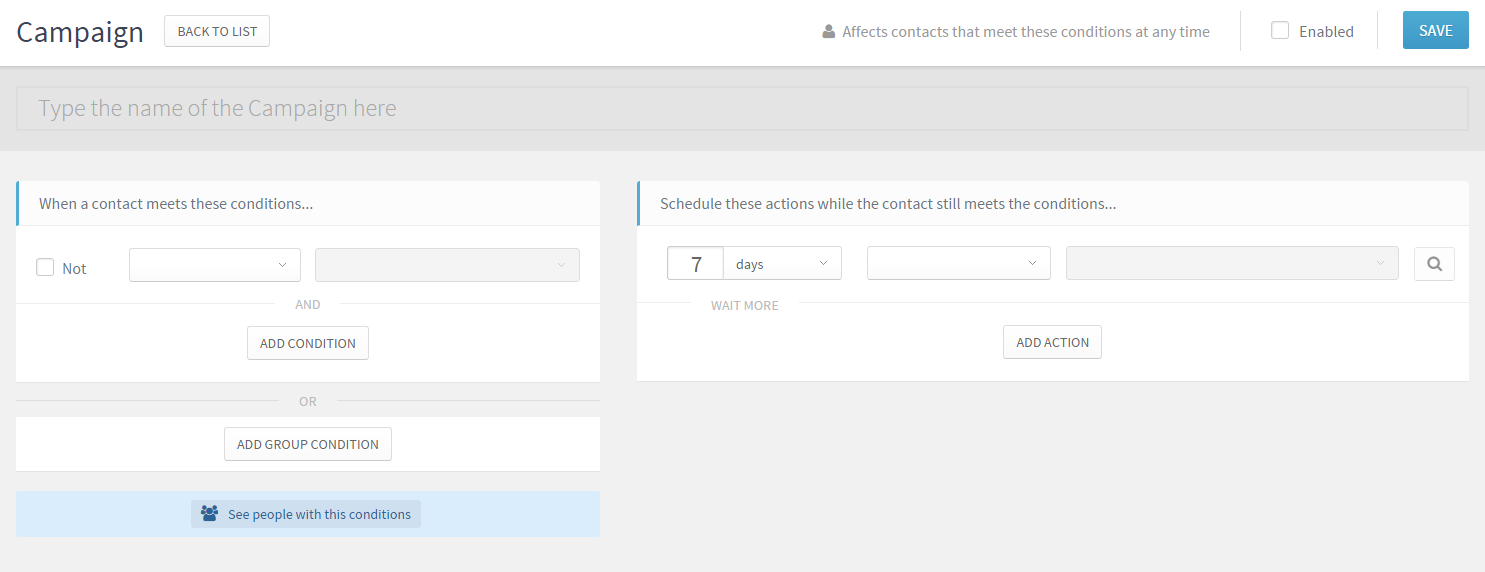
This is how an empty campaign screen looks like.
Let’s take a look to every item on this screen, shall we?
Type the name of the Campaign here: well, give this campaign a name.
When a contact meets these conditions…: here you’ll choose the conditions that will trigger the campaign. One of the options is “executed event” and you should start from here.
Remember that you already has events based on your forms, so you can choose one of the events (if you have more than one) and create a campaign.
One campaign could be, for example, triggered for everyone who register to try your service (if you’re a SaaS). You’d probably have the event “Register” from /trial/ and this would be your trigger.
Now that you chose the trigger is time to schedule the messages.
Schedule these actions while the contact still meets the conditions: so you have a trigger and now you need the actions (messages).
First you have to choose the time frame: minutes, hours, days. Then you need to choose the email you’ll send. I know, I didn’t explain how to create an email, but you have the option to create the email on the go and later on write the message (next topic will be about it).
Create the flow of messages, with the emails names on it and when you’re done save the campaign but don’t enable it yet!
Write the email
Now you have events and a campaign. You need the email with the message you want to send to your contacts. There are two ways you can write the email: while creating the campaign (choosing the option to create a new one and spending your time to write the email before continuing to edit the campaign) or after you finished structuring your campaign.
For this guide let’s choose the second option, you finish structuring your campaign first and then write the email.
To edit the emails you just need to click on the magnifying glass next to the email name to get a preview of the message and click to edit. You’ll be redirect to the screen to create the emails.
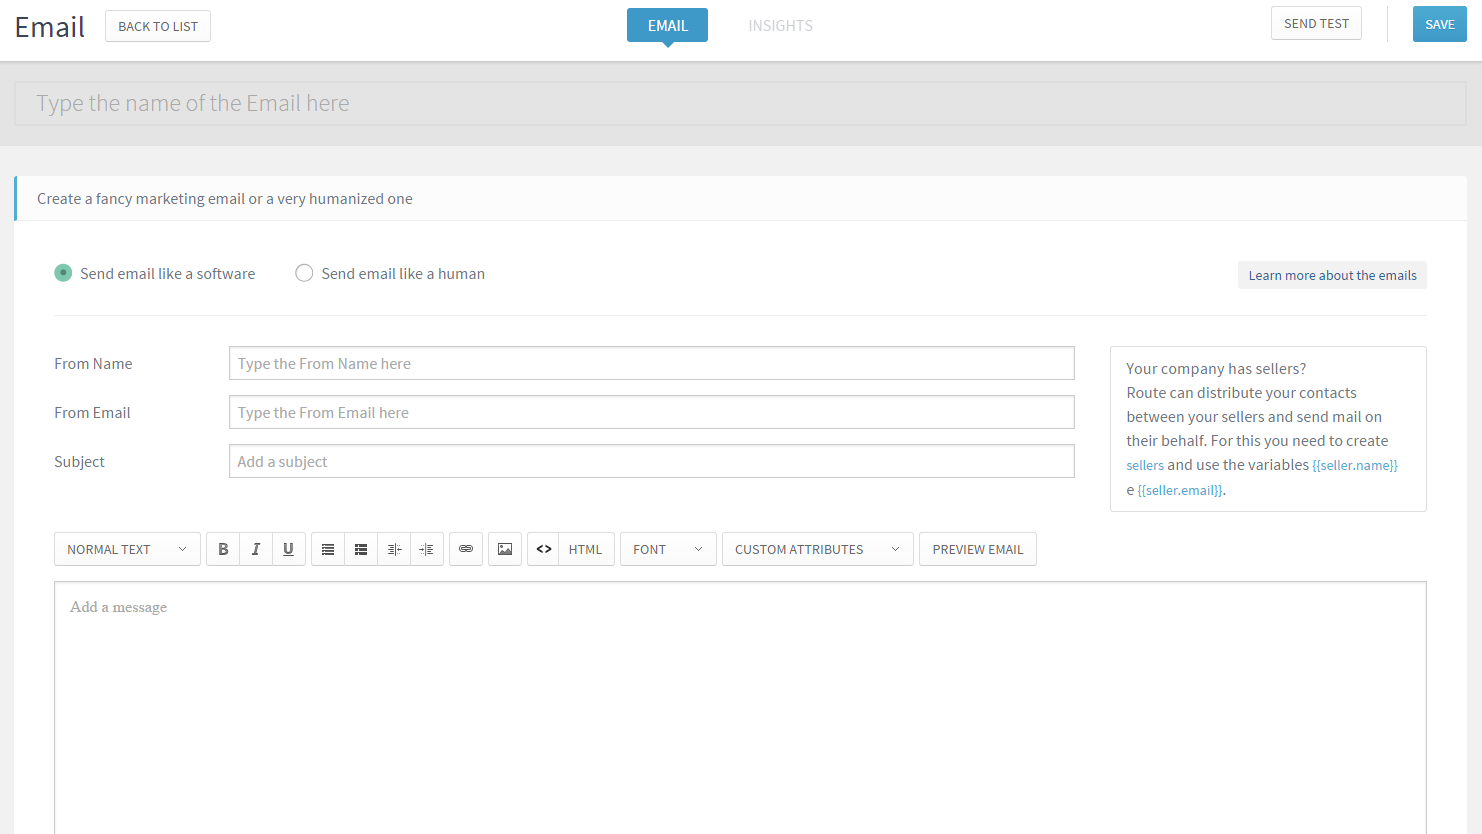
This is what you’ll see when creating an email from scratch.
What I want you to focus is on the two options you get: send email like a software and send email like a human.
If you want to send a message that’s like any email marketing you’re used to send (and receive), with a fancy template and not so customized indicating clearly that it’s message customized for a lot of people, you need to choose send email like a software.
To send this email you’ll have to give information about your company’s address and the unsubscribe link will be added to your email if you don’t put it on the message on your own.
If you want to send an email that seems to be written by a real person, like a one to one message, choose the option send email like a human. Here your copy will have as much editing as possible. Just use plain text.
While creating this email imagine yourself really writing to the person that will receive it. When you finish take some time to imagine yourself receiving this email and see if you’d find it believable or you’d see it and notice that it’s automated.
Emails like a human don’t need to have an unsubscribe link but DO NOT USE IT TO SEND SPAM. Caps Lock level of importance.
Now that you have the emails ready, go back to the campaign and enable it!
Enable the campaign
This step it’s pretty clear. Just go back to the campaign, hit enable and save it.
Easy, right? Yes.
But, there’s one more thing that might get you confused. When you enable and save you’ll get the following message if Route already tracked contacts that meet the conditions you chose to be the triggers:
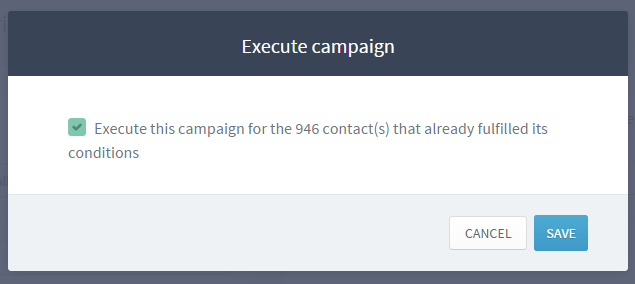
This is one example from our own Route account.
Don’t need to freak out over this message because you don’t know what to do. It’s quite simple:
If you want to trigger the campaign for contacts that met the conditions BEFORE you enabled the campaign let the check-box checked and if you want only to new contacts that meet the conditions AFTER you enable it to receive the messages leave the check-box empty.
After enabling you just need to wait for people to fill in the forms on your website to start sending them the messages. Don’t believe us? Do a test. Go to the form that you used to create the campaign and put your email there to see what will happen.
Need help any help? If you need any help to start using Route just send us an email to friends[at]route[dot]to.